How to Glue Leather Bags and Wallets – Step-by-Step Guide
How to Glue Leather Bags and Wallets – Step-by-Step Guide
Gluing leather properly is essential to ensure your leather bags and wallets stay durable and look polished. Whether you're repairing a tear, attaching decorations, or crafting a new piece, using the right adhesive and technique makes all the difference. In this step-by-step guide, we’ll show you how to bond leather safely, achieve a strong hold, and maintain the quality of your bags and wallets without causing damage.
Table Of Contents
- 1. Introduction – How to Glue Leather Bags and Wallets
- 2. Types of Leather – Choosing the Right Material
- 3. Choosing the Right Adhesive for Leather
- 4. Preparing Leather Surfaces for Gluing
- 5.Step-by-Step Gluing Process
- 6. Drying and Curing – Ensuring a Strong Bond
- 7. Tips and Tricks – Avoiding Common Mistakes
- 8. FAQs
1.Introduction – How to Glue Leather Bags and Wallets
Gluing leather is an essential skill for anyone who wants to repair, craft, or customize leather bags and wallets. Whether it’s fixing a tear, attaching decorative pieces, or creating a new design, using the right adhesive and proper technique ensures a strong, long-lasting bond. In this guide, we’ll walk you through everything you need to know — from preparing your leather surfaces to applying glue safely and effectively — so your bags and wallets stay durable, functional, and stylish.
- Learn why proper gluing is essential for leather bags and wallets.
- Understand different types of leather and how they affect adhesive choice.
- Discover the best adhesives for long-lasting, strong bonds.
- Follow step-by-step techniques to prepare and glue leather safely.
- Get tips to avoid common mistakes and ensure professional results.
Tip
Always test your adhesive on a small, hidden area of the leather first. This helps ensure it won’t discolor, stiffen, or damage the material. Using too much glue can also cause seepage or uneven bonding, so apply it sparingly and precisely for the best results.
2. Types of Leather – Choosing the Right Material
Different types of leather behave differently when glued. Choosing the right material is crucial for a strong and lasting bond. Here are the main types of leather you may encounter in bags and wallets:
- Full-Grain Leather: The highest quality leather, durable and strong. Ideal for gluing as it holds adhesive well without easily tearing.
- Top-Grain Leather: Slightly thinner than full-grain but still durable. Works well with most leather adhesives.
- Genuine Leather: Lower-quality leather made from layers of leftover hides. Gluing may require extra preparation for a secure bond.
- Suede: Soft and textured, requires specialized adhesives for flexible, strong bonding.
- Pleather or Faux Leather: Synthetic leather may not absorb glue well, so use adhesives specifically designed for synthetic materials.
3. Choosing the Right Adhesive for Leather
Selecting the proper adhesive is key to achieving a strong and durable bond for your leather bags and wallets. Different adhesives work better depending on the type of leather and the project.
- Leather Glue or Leather Cement: Specifically formulated for leather, provides a strong, flexible bond. Ideal for repairs and small crafts.
- Contact Cement: Works well for bonding large leather surfaces. Apply to both surfaces, let it dry slightly, then press together for a permanent bond.
- Super Glue (Cyanoacrylate): Best for small areas or quick fixes. Be cautious, as it can harden the leather if over-applied.
- Epoxy Resin: Strong and durable, suitable for heavy-duty repairs. Requires careful mixing and application.
- Fabric or Craft Glue: Some flexible craft adhesives can work on softer leathers but may not be as strong as leather-specific glues.
4. Preparing Leather Surfaces for Gluing
Proper preparation of leather surfaces is essential for a strong and long-lasting bond. Skipping these steps can result in weak adhesion or damage to your bags and wallets.
- Clean the Surface: Remove dirt, dust, and oils using a soft cloth and mild leather cleaner. Ensure the leather is completely dry before applying glue.
- Roughen Smooth Leather: Lightly scuff glossy or smooth leather surfaces with fine-grit sandpaper. This helps the adhesive grip better.
- Trim Edges: Make sure torn or uneven edges are cleanly cut. This ensures a neat, strong bond when glued.
- Test Fit: Align the pieces before applying adhesive to make sure everything fits perfectly, avoiding mistakes during gluing.
- Use Protective Surfaces: Work on a clean, flat surface covered with parchment paper or cardboard to prevent accidental glue stains.
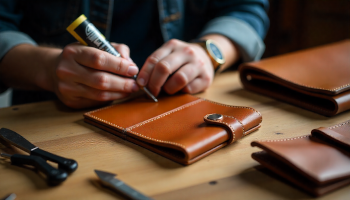
5. Step-by-Step Gluing Process
Gluing leather bags and wallets requires careful attention to detail to ensure a strong, long-lasting bond. By following a systematic step-by-step process, you can avoid common mistakes like misalignment, seepage, or weak adhesion. This section will guide you through each stage — from preparing the surfaces to applying the adhesive and pressing the pieces together — so your leather items remain durable, functional, and looking their best.
| Step | Action | Tips |
|---|---|---|
| 1 | Clean the surfaces thoroughly with a soft cloth and leather cleaner. | Ensure no dirt, dust, or oils remain; dry completely before gluing. |
| 2 | Lightly roughen smooth leather surfaces with fine-grit sandpaper. | This improves adhesive grip and prevents slipping. |
| 3 | Apply a thin, even layer of adhesive to both surfaces. | Use sparingly to avoid seepage; follow manufacturer instructions. |
| 4 | Let the adhesive become tacky if required (contact cement). | Check instructions; this ensures a stronger bond. |
| 5 | Carefully align and press the leather pieces together. | Apply firm, even pressure for a few minutes. |
| 6 | Clamp or weigh down the glued area if needed. | Helps maintain proper contact and prevent shifting during drying. |
| 7 | Allow the glue to cure fully according to the adhesive’s instructions. | Do not use the bag or wallet until completely dry for maximum strength. |
6. Drying and Curing – Ensuring a Strong Bond
After gluing your leather bags or wallets, proper drying and curing are essential to achieve a durable and long-lasting bond. Skipping this step can weaken the adhesion and reduce the lifespan of your leather items.
- Allow Adequate Drying Time: Follow the adhesive manufacturer’s recommended drying time. Most leather glues require several hours to become tack-free.
- Maintain Pressure: Keep the glued pieces pressed together using clamps, heavy books, or weights during drying to prevent shifting or weak spots.
- Avoid Heat and Humidity: Place the glued item in a dry, well-ventilated area. Excessive heat can cause bubbling, while humidity may slow curing.
- Full Curing Time: Even after initial drying, allow the adhesive to cure fully (usually 24–48 hours) before using the bag or wallet. This ensures maximum strength and flexibility.
- Check the Bond: Gently test the glued area after curing to confirm a secure hold. If edges lift, reapply adhesive and repeat the drying process.
7. Tips and Tricks – Avoiding Common Mistakes
Gluing leather can be tricky, and even small errors can affect the final result. Following practical tips and avoiding common mistakes will help ensure your leather bags and wallets are repaired or crafted perfectly. Here’s a quick guide to help you work efficiently and safely
| Common Mistake | Solution / Tip |
|---|---|
| Applying too much glue | Use a thin, even layer to prevent seepage and uneven bonding. |
| Not cleaning the leather properly | Always clean and dry surfaces before gluing to ensure maximum adhesion. |
| Misalignment of leather pieces | Test fit the pieces before applying glue and use clamps or weights to hold them in place. |
| Rushing drying and curing | Allow full drying and curing time as recommended by the adhesive manufacturer. |
| Using the wrong adhesive | Select a glue suitable for the type of leather and project for a strong, flexible bond. |
| Excessive heat or humidity | Dry and cure in a well-ventilated area at room temperature to avoid weakening the bond. |
Tip: Take your time, work carefully, and always test adhesives on a hidden area first. Attention to detail ensures your leather projects stay durable and look professional.
8.FAQs
1. Can I use regular super glue on all types of leather?
Super glue can work for small repairs, but it may harden the leather and is not ideal for flexible areas. Leather-specific adhesives are recommended for best results.
2. How long should I wait before using a glued leather bag or wallet?
Follow the adhesive manufacturer’s instructions. Generally, allow at least 24–48 hours for full curing before using the item.
3. How do I prevent glue from seeping onto visible surfaces?
Apply glue sparingly and evenly. Use a toothpick or small brush for precision and protect surrounding areas with tape or parchment paper.
4. Can I glue synthetic leather (pleather) the same way as real leather?
Synthetic leather may require specialized adhesives designed for non-porous materials. Always test on a hidden area first.
5. What should I do if the glued area comes apart?
Clean off the old adhesive, prepare the surfaces again, and reapply a suitable leather adhesive. Ensure proper pressure and curing time.
6. Is it necessary to clamp leather while drying?
Clamping or weighting helps maintain contact and prevents shifting, which ensures a stronger bond. For small areas, firm hand pressure may suffice.
7. Can glued leather still be flexible?
Yes, if you use a flexible leather adhesive and avoid over-applying glue, the leather should retain its natural flexibility.
8. How do I clean up excess glue?
Remove excess glue immediately with a damp cloth or according to the adhesive instructions. Hardened glue may require gentle scraping or leather-safe solvent.
9. Can I glue leather for decorative purposes?
Yes, leather adhesives are excellent for attaching patches, trims, or embellishments. Ensure proper drying and curing to prevent peeling.
10. Are there any safety precautions I should take?
Work in a well-ventilated area, avoid skin contact with adhesives, and follow manufacturer safety instructions. Wearing gloves can protect your hands.
-
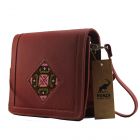 Handmade Flower Embroidered Crossbody Shoulder BagPKR 6,500.00 FREE SHIPPING IN PAKISTAN
 -
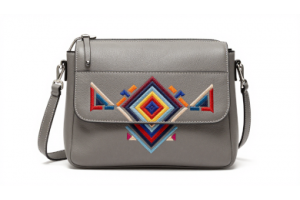
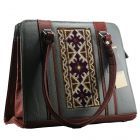 Gray Leather Medium Crossbody Bag with Hand Stitched EmbroideryPKR 12,000.00 FREE SHIPPING IN PAKISTAN
 -
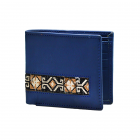 Leather Gents Wallet|Navy bluePKR 2,000.00 FREE SHIPPING IN PAKISTAN
 -
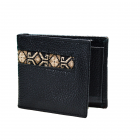 Leather Embroidered Gents Wallet|black-2PKR 2,000.00 FREE SHIPPING IN PAKISTAN
 -
 Leather Embroidered Gents Wallet|L-brownPKR 2,500.00 FREE SHIPPING IN PAKISTAN