Custom Leather Engraving Guide for Handmade Bags & Accessories
Custom Leather Engraving Guide for Handmade Bags & Accessories
Custom leather engraving adds a personal, premium touch to handmade bags and accessories. Whether it’s a name, logo, pattern, or message, engraving transforms simple leather into a one-of-a-kind piece. In this guide, you’ll learn everything you need to know about leather engraving—from the best tools and techniques to safety tips and design ideas. Whether you’re a beginner or a skilled leather crafter, this step-by-step guide will help you create long-lasting, professional-quality engravings on bags, wallets, belts, and more.
Table Of Contents
1. Introduction – Custom Leather Engraving for Handmade Bags & Accessories
Custom leather engraving is one of the best ways to add a personal, premium touch to handmade bags and accessories. From initials and brand logos to artistic patterns and meaningful quotes, engraving turns ordinary leather into a unique statement piece. Whether you’re crafting leather handbags, wallets, belts, or keychains, engraving enhances both the visual appeal and the long-term value of your product. In this guide, you’ll learn the tools, techniques, preparation steps, and safety tips needed to achieve clean, professional-quality engravings on leather—perfect for beginners and experienced crafters alike.
- Leather Engraving Pen: Perfect for detailed hand engraving and light designs.
- Swivel Knife: Used to cut clean design lines before stamping or carving.
- Stamping Tools: Create patterns, textures, and decorative effects on leather.
- Laser Engraving Machine: Best for professional, logo, and batch engraving work.
- Mallet or Hammer: Helps apply controlled force to stamping tools.
- Tracing Paper: Transfers your design accurately onto the leather surface.
- Metal Ruler: Keeps lines straight and measurements precise.
- Cutting Mat: Protects your work surface during hand engraving.
- Leather Conditioner: Restores moisture after engraving is complete.
Tip
Custom leather engraving works best when you take your time and focus on precision. Always test your design on a scrap piece of leather before engraving your final bag or accessory. Use light pressure at first and deepen the engraving gradually to avoid cutting too deeply. Keep your tools sharp and clean for smooth, professional lines. Slightly dampening vegetable-tanned leather can make hand engraving easier and more detailed. Make sure your leather is flat and firmly secured to prevent slipping. After engraving, apply a quality leather conditioner to restore moisture and enhance the final look of your design.
2. Tools You Need for Custom Leather Engraving
Having the right tools is the foundation of clean, professional-quality leather engraving. Whether you’re customizing handmade bags, wallets, belts, or small leather accessories, the tools you choose directly affect the precision, depth, and finish of your design. From simple hand tools for beginners to advanced laser machines for detailed branding work, each tool serves a specific purpose in the engraving process. In this section, you’ll learn which tools are essential, how they are used, and how to choose the right ones based on your skill level and project type.
- Swivel Knife: Used to carve clean and smooth design lines before engraving.
- Leather Engraving Pen: Ideal for freehand engraving, names, and fine details.
- Stamping Tools: Create decorative patterns, borders, and texture effects.
- Laser Engraving Machine: Best for logos, branding, and professional bulk engraving.
- Rawhide or Wooden Mallet: Applies controlled force without damaging tools.
- Tracing Film or Paper: Helps transfer designs accurately onto leather.
- Scratch Awl: Marks guidelines and improves design accuracy.
- Cutting Mat: Protects your workspace and stabilizes the leather.
- Masking Tape: Holds designs in place during engraving.
- Leather Conditioner: Restores moisture and shine after engraving is complete.
3. Preparing the Leather for Engraving
Properly preparing the leather is one of the most important steps for achieving clean, sharp, and professional-looking engravings. Without the right preparation, even the best tools can produce rough lines, uneven depth, or damaged leather. Preparing the surface helps the design transfer clearly, allows smoother carving or laser engraving, and reduces mistakes. In this section, you’ll learn how to clean, moisten, flatten, and mark leather correctly before engraving to get the best possible results on handmade bags and accessories.
- Clean the Leather Surface: Remove dust, oil, and dirt using a soft dry cloth or leather-safe cleaner.
- Lightly Dampen the Leather: Slightly moisten vegetable-tanned leather to make carving smoother.
- Let the Moisture Set: Wait until the leather returns to its natural color before engraving.
- Flatten the Leather: Ensure the leather lies flat to prevent uneven engraving depth.
- Transfer the Design: Use tracing paper or film to copy your pattern onto the leather accurately.
- Secure the Leather: Hold the leather in place with masking tape or clamps to avoid slipping.
- Test on Scrap Leather: Always practice your pattern before engraving the final piece.
- Check Leather Thickness: Make sure the leather is thick enough to hold the engraving without tearing.
4. Best Methods for Engraving Leather
Choosing the right engraving method is key to achieving professional-quality designs on leather bags and accessories. Different methods offer different levels of detail, durability, and ease of use. Hand engraving, stamping, and laser engraving are the most popular techniques, each suited for specific projects and skill levels. In this section, you’ll learn how each method works, what tools are required, and which techniques are best for beginners versus advanced crafters, helping you select the perfect approach for your custom leather projects.
- Hand Engraving: Uses swivel knives or engraving pens to carve designs manually, ideal for detailed and personalized patterns.
- Stamping: Employs metal or wooden stamps to imprint patterns, letters, or logos with the help of a mallet, perfect for repetitive designs.
- Laser Engraving: Uses a laser machine to burn precise designs into the leather, suitable for professional branding and intricate details.
- Pyrography (Leather Burning): A technique that uses heated tools to create dark, decorative designs on leather surfaces.
- Embossing: Presses designs into leather using molds or plates, creating a raised or recessed effect without cutting the surface.
- Combination Techniques: Mixing hand engraving, stamping, or laser methods for unique, layered designs.
5. Step-by-Step Guide – How to Engrave Leather Cleanly
Engraving leather requires patience, precision, and proper technique to achieve clean, professional results. Whether you are personalizing a handmade bag, wallet, or belt, following a step-by-step process ensures your design comes out sharp and lasting. In this guide, we’ll walk you through each stage—from preparing the leather and transferring your design to carving, stamping, or laser engraving—so you can create beautiful, custom pieces with confidence, even if you’re a beginner.
| Step | Action | Tips |
|---|---|---|
| 1 | Prepare the Leather | Clean the surface, lightly dampen vegetable-tanned leather, and ensure it is flat. |
| 2 | Transfer the Design | Use tracing paper or film to accurately copy your pattern onto the leather. |
| 3 | Select the Engraving Method | Choose between hand engraving, stamping, laser engraving, or pyrography based on your project. |
| 4 | Engrave the Design | Start lightly, gradually increasing pressure. Follow the lines carefully for precision. |
| 5 | Check & Adjust | Inspect your work and make minor corrections or deepen lines if needed. |
| 6 | Clean the Surface | Remove any dust or debris from carving using a soft brush or cloth. |
| 7 | Apply Leather Conditioner | Restore moisture and enhance the final look of your engraving. |
6. FAQs
1. What tools do I need for custom leather engraving?
You’ll need tools like a swivel knife, leather engraving pen, stamping tools, mallet, tracing paper, and optionally a laser engraving machine for professional designs.
2. How do I prepare leather for engraving?
Clean the surface, lightly dampen vegetable-tanned leather if needed, flatten it on a solid workspace, and transfer your design using tracing paper or film.
3. Can I engrave any type of leather?
Most natural leathers like full-grain, top-grain, and vegetable-tanned leather work best. Thin or delicate leathers require extra caution to prevent tearing or uneven engraving.
4. How do I avoid mistakes during engraving?
Start with light pressure, practice on scrap leather first, keep tools sharp, and follow your design lines carefully to prevent errors or uneven cuts.
5. What is the best method for beginners?
Hand engraving with a swivel knife or pen is ideal for beginners. Stamping can also be used for simple patterns. Laser engraving is better for advanced users or professional projects.
6. How do I maintain precision in detailed designs?
Use tracing paper, secure the leather to prevent slipping, work slowly, and break complex designs into smaller sections to maintain accuracy.
7. Should I condition leather after engraving?
Yes. Conditioning restores moisture, prevents drying or cracking, and enhances the appearance of your engraved design.
8. Can I combine engraving methods?
Absolutely. You can combine hand engraving, stamping, and laser engraving for layered or intricate designs to achieve unique effects.
9. How do I fix engraving mistakes?
Minor mistakes can sometimes be blended in or darkened with dyes. For larger errors, consider adding decorative elements, embossing, or patching to mask them.
10. Are there safety tips for leather engraving?
Always work in a well-lit area, keep tools sharp, avoid excessive pressure, and wear protective gloves if using heated or laser equipment.
-
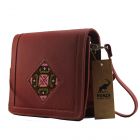
 Cross shoulder leather bag, hand stitched embroidery, bag, handbag, charcoalPKR 3,500.00 FREE SHIPPING IN PAKISTAN
 -
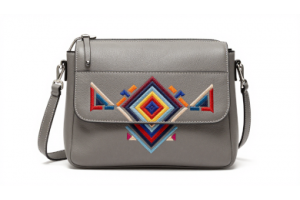
 Handmade Flower Embroidered Crossbody Shoulder BagPKR 6,500.00 FREE SHIPPING IN PAKISTAN
 -
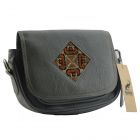
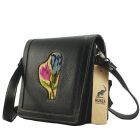 Handmade Flower Embroidered Small Crossbody Bag – BlackPKR 6,500.00 FREE SHIPPING IN PAKISTAN
 -
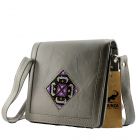 Handmade Flower Embroidery Crossbody Shoulder Bag GrayPKR 6,500.00 FREE SHIPPING IN PAKISTAN
 -
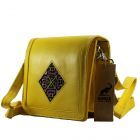 Trendy Yellow Handmade Flower Crossbody BagPKR 6,500.00 FREE SHIPPING IN PAKISTAN